dissabte, 20 de març del 2021

Jumper EZBook 2 model 464 keyboard repair


 Sembla ser que els teclats dels ordinadors Jumper (també sota les marques Injoo, Vexia, i Primux) de la serie EZBook tenen certa propensió a trencar-se.

Son equips de procedència xinesa i d'un mercat molt econòmic, això es nota en les seves poques capacitats per a poder ser reparats.

El principal problema és que el propi teclat conté la tecla de posta en marxa de l'ordinador, per tant, quan falla el teclat, l'ordinador no s'engega. No obstant, jugant una mica amb el flex del teclat, fent alguna mena de contacte, s'aconsegueix que l'ordinador s'engegi i amb un teclat usb extern es por fer servir, i comprovar que funciona.

Per tant, la reparació necessària és tan sols del teclat.

Vejam com es repara:


 Looks like Jumper EZbook keyboards are prone to failure (Jumper brand is also found under Injoo, Vexia and Primux brands).

These are chinese computers aimed to the cheap consumer. Don't expect them to be easily repairable.

Main issue is that the keyboard contains the power on button. Hence, you can't power on when you have a keyboard issue. Messing with the flex inside the connector you can manage to start the computer and see that nothing else is affected. You can use a usb keyboard to use the computer.

So, the required repair is only the keyboard.

Let's see how to repair Jumper EZbook:


1: Open back cover and remove mainboard


 Desfer els connectors de la bateria, LCD, teclat, touchpad, plaqueta de USB i auriculars i desoldar els cables dels altaveus i del micròfon.

 Unfasten battery connectors, LCD, keyboard, touchpad, usb+headphones assembly, and unsolder the speaker and microphone cables.


2: Remove LCD and battery.


 Desmuntar la plaqueta del usb i auriculars, desenganxar la bateria, que està enganxada amb cinta adhesiva i desmuntar tota l'assembly de la pantalla.


 Remove the usb+headphones assembly, remove battery (adhesive tape) and remove the whole screen+hinges assembly


3: Remove the keyboard cover and the keyboard assembly


 Aquesta és la part dificil: el teclat no està fet per a ser desmuntat: està dins d'una tapa metàl.lica que està muntada i soldada amb plastic fos, a la carcassa de l'ordinador.

Per tant, caldrà trencar tots els punts de soldadura, i després refer-los amb cola epoxi.
 This is the difficult part: keyboard is not meant to be repairable. It is inside a metal cover that is soldered, through melted plastic supports, to the plastic notebook palmrest cover.

Hence, we will need to crack all these solders, and redo later with epoxi.


4: Install replacement keyboard


 Hi ha dues versions d'aquest ordinador. Es diferencien per el tamany de la tecla que hi ha sobre l'enter. En el meu cas és la versió que a Aliexpress anomenen com a "new version".

Cal dir, que aquest és un Ezbook 2 amb un processador x5-z8300, i que és identificat en molts casos com un "primera edició".

El recanvi que cal comprar és el que s'indica al flex del teclat. En el meu cas posava MB3002003US

Durant la col.locació, cal refer els punts de soldadura

1) Superglue (cianoacrilat). Una petita gota de cola penetrant farà soldadura a la part que no és accessible. Posar-ne molt poca! Esperar 30 min per secar.

2) Araldit (epoxy). una gota gens penetrant, farà de soldadura per la part posterior. Deixar secar 2 hores.

Seria més senzill si ho haguessin fet amb cargolets, enlloc de soldadures de plàstic.
 There are several versions of this computer. You can see the key over the enter key, that sometimes is larger that other. In my case, Aliexpress said this is the "new version"

My Ezbook 2 has a x5-z8300 and is the new version. Not to be confused with the x5-z8350.

The final word is the part number shown in the keyboard flex: mine is: MB3002003US

New parts will need to be "resoldered" using glue:

1) Use Superglue (cianoacrilate). A VERY SMALL amount of superglue, being very penetrating glue, will help to attach the keyboard to the cover. Wait 30 minutes to allow for curation.

2) Use Araldit (2 component epoxy) not very penetrating to redo the solder points at the back. Allow 2 hours to cure (read glue manufacturer manual)

It would be probably easier if they used screws instead of melting plastic.


Superglue penetrating glue. Very small amount.

2-component epoxy to create a solder point.

Solder points done. Waiting for curation.

Install cover, place a weight on the cover. 
Dell heavy computing :-)

Again: a small drop of superglue to attach the inner part of the cover.

2-component epoxy to recover the solder point.


5: Reassemble


 Una vegada esperat el temps requerit pel fabricant de la cola epoxy, ja es pot muntar l'ordinador.

 Once the epoxy glue is cured (see glue manufacturer manual), we can reassemble the computer.


Palmrest recovered with a new keyboard.

Make sure this metallic adhesive tape is well attached to the cover. Nobody wants a short in the mainboard.

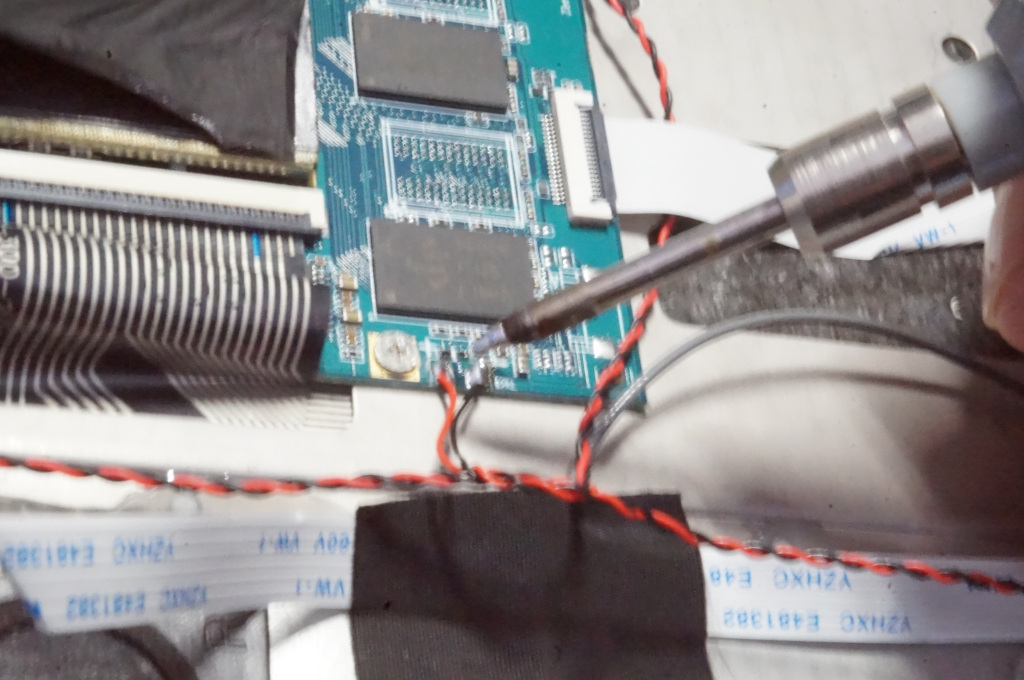
Resolder the speakers cables and the microphone.

Reattach the battery to the keyboard cover using new strong adhesive tape.

Reinstall LCD assembly and refasten all the flex cables. Finish with the battery connector.

EZBook 2 model 464 recovered!


 Un altre aparell que ha deixat de ser residu electrònic per a tornar a fer servei.


Materials i eines:

- Tornavis miniatura i palanca d'obrir carcasses de plàstic.
- Soldador electrònic i fil d'estany
- Cutter
- Superglue (cianoacrilat)
- Araldit (epoxy)
- Cinta americana per aguantar la bateria

 Another electronic device that will be saved from electronic waste. 


Materials and tools:

- miniature philips screwdriver and plastic pry tool
- Electric solder and tin/lead solder wire
- Cutter (precision knife)
- Superglue (cianoacrilate)
- 2-component epoxy
- strong adhesive tape to attach the battery.


diumenge, 10 de gener del 2021

Dell Latitude E7240 touch panel with bubbles, stains and leaky gummy. Replacement.


 Dell Latitude E7240 touch panel with bubbles, stains and leaky gummy. Replacement.


Tots els que ens guanyem la vida amb la informàtica solem tenir un bon arsenal d'equips. En aquest cas tinc un parell de Dell Latitude E7240 Touch, que son un parell de ultrabooks de 12 polzades amb pantalla d'alta definició, que permet fer feines de camp de forma excel.lent, tant en windows com en linux.

D'un dia per l'altre van començar a sortir bombolles d'aire sota la pantalla, i va durar un parell d'anys, que les bombolles van anar augmentant. Recentment, les bombolles es van fer molt grans, va començar a sortir un liquid molt enganxós per sota la pantalla, i el panell reflector de llum es va tacar amb unes ombres molt lletges.

Vaig pensar que s'havien aixafat, en les dues motxilles que tinc. Però amb el temps vaig comprovar que hi havia molta gent, a Internet, amb aquest problema. El cas és que la cola de sota del panell tàctil es degrada, es torna líquida, i suqueja per sota la pantalla i penetra dins del panell de cristall líquid, tacant les fulles reflectores.

Dell no va ser de gran ajuda. Els vaig contactar i em van dir que els donés els Tags. Van dir que no estava en garantia i em van convidar a fer una enquesta. No els vaig deixar gaire bé, doncs el Dell 6230 que havia tingut abans ja havia tingut algun problema de degradació del reposamunyeques, que estava revestit d'aquella goma que acaba tornant-se enganxosa.

Igual que l'altra vegada, Aliexpress sol ser de més ajuda: vaig encarregar el recanvi i el vaig instal.lar a casa.

Every IT pro use to have a good collection of computer gear at home.

I have a couple of Dell Latitude E7240 touch. They are ultrabook class devices, that having only 12 inch LCDs but offering FullHD resolution, a decent battery life for the weight, a processor that allows for virtualization, and a wired network interface, make them excellent for field operation using either windows or linux.

Some time ago I noticed some air bubbles under the touch panel. They were like this during 2 years. All of sudden, the bubbles grew, and some gummy thing started to leak under the LCD panel. The backlight reflector got stained and very ugly shades appeared.

I thought that the computers were damaged during storage. I may have crushed them. But searching the internet I could see that there were a good bunch of people complaining about the issue. Looks like the glue under the Touch panel gets degraded, turns liquid, and leaks some sticky thing to lcd clamshell, and into the LCD backlight reflection sheets.

Dell was of no help. I contacted, asked the service tags and confirmed that they were out of warranty. They sent me to an online survey about product quality. Since I was also victim of the Dell E6230 palmrest gummy rubber paint, I complained a lot. Dell has some serious problems with materials.

Aliexpress came handy again: I ordered the spare parts and instaled by myself.


Dell Latitude E7240 touch panel with bubbles under the panel.


Dell Latitude E7240 touch panel with stained backlight


El problema és que el panell LCD no porta cargols: és una carcassa on les dues meitats van enganxades.

Cal utilitzar eines per obrir carcasses de plàstic.
The problem is that the LCD is inside a clamshell that has no screws. Two halves are glued together.

We will need tools for plastic pry and open.


Tools required. Plastic Pry tools and contact glue. The best one is the green.


Per partir la carcassa, començar punxant.To crack open the clamshell start tu pry between the halves.


Work the tool along the crack to break the glue.


Anar desllissant l'eina per l'esquerda, acaba trencant la goma que les uneix.


Working the tools in the crack, glue gets broken and you can open the halves.


Work the tools along the crack to break the glue.


Cal anar amb compte amb els diferents elements a l'interior: tots han de quedar enganxats a la tapa de fora. La cola és prou forta com per a causar desperfectes.Take care with the different devices inside. All these must remain attached to the outer cover. Glue is so strong that may break some devices.


Take care with internal devices. They must keep attached tot he outer cover
Glue is so strong that may cause some device damage. See image.
Use a long tool to work the lower part of the LCD assembly.


LCD Assembly internals. There are three antenna devices plus the camera.
I damaged one of these.


Hopefully, it is only a cover that could be installed again. Nothing serious.


Here we can see a leak of the sticky thing.


Aliexpress serveix el recanvi com a LCD o com a LCD amb el marc.
Evidentment és molt més fàcil fer la feina, si es compra el recanvi amb el marc ja enganxat.
Aliexpress offers the LCD and the LCD with bezel.

The job is much easier, using the LCD+Bezel spare part


Aliexpress Spare part: You better purchase the LCD+Bezel. There's also offered the LCD only option.


For those willing to know about the part numbers:
LP125WF1 (SP)(A4) manufactured by LG Display
D/PN:0PY6P2 (older damaged)
D/PN:05CXGG (aliexpress replacement)


Per desconnectar El LCD cal arrencar in celofan i desencaixar un "seguro" que Porta El connectorLCD connector is secured through an adhesive strap and a latch in the connector


Connectem la pantalla de repost per a veure si funciona tot correcteSimply connect the replacement screen and check if everything is OK


Replacement LCD connected to check if everything's fine.


Abans d'encolar les pieces convé netejar les restes de l'anterior. Fer servir un troç de roba i alcohol. Ningú vol tenir problemes d'enganxament, no?Before glueing the lcd covers again, it is mandatory to clean the matching surfaces. Use a cloth rag and alcohol. Nobody wants a glue failure.


He provat de fer servir una cinta adhesiva de double cara per tornar a enganxar la carcasses, però no ha funcionat.

Provaré cola de contacte, que sembla que pot ser el que millor funcionarà. Quan vaig desmuntar-ho, semblava cola de contacte.
I tried to use double sided adhesive tape, but the results were not good.

I'll use contact glue. I think it will do the job. After all, when I unglued the clamshell, the glue I removed was like contact glue.


Used contact glue.


Seguiu les instruccions del fabricant de la cola:
1: Escolar
2: Ajuntar
3: Separar per endurir 1min.
4: Ajuntar i mantenir pressionat 24h 
Follow the glue manufacturer's instructions to use.
1: Apply glue
2: Join both halves
3: Split again and let it cure 1min.
4: Close both halves and apply pressure for 24h


Glue cure procedure


Pressure for 24h


Després de 24h, la carcassa ha quedat perfectament tancada i resistent. After 24h, LCD assembly is propperly closed and strong.


Finishing is near perfect.


YAY! Dell Latitude E7240 ready to use again!

diumenge, 27 de gener del 2019

Nitsuko PB4500-0700 Console Cable and Nitsuko Builder


Fa algun temps ja em van demanar fer un cable de impressora DB25 serie per aquesta NITSUKO PB4500. Teniu l'article aquí:

http://mmalagelada.blogspot.com/2016/02/nitsuko-pb4500-serial-printer-db25m-to.html

Ara farem l'altre cable: el de programació des del PC

Some time ago I was required to build a printer cable for the Nitsuko PB4500 having a DB25 serial printer. Here you are the article:

http://mmalagelada.blogspot.com/2016/02/nitsuko-pb4500-serial-printer-db25m-to.html

Now we need to build the programming cable


PINOUT that I found in a cable from a customer and WORKS


NITSUKO - PC
RJ45 - (DB9F)
-------------------------------------
1 ---------------- 4 (DTR)
2 ---------------- 8 (CTS)
3 ---------------- 2 (RXD)
4 ---------------- 3 (TXD)
5 -------------- no connect
6 ---------------- 7 (RTS)
7 ---------------- 5 (GND)
8 ---------------- 6 (DSR)


PINOUT that I found in Internet and DOES NOT WORK for me:

NITSUKO - PC
RJ45 - (DB9F)
-------------------------------------
1 -------------- n/c
2 ---------------- 4
3 ---------------- 2
4 ---------------- 3
5 ---------------- 8
6 ---------------- 7
7 ---------------- 5
8 ---------------- 6


He vist alguns fòrums que demanen descarregar el programa Nitsuko Builder i parla que només està disponible una versió holandesa a:
http://members.fortunecity.com/kisbv/software.htm

Aquest lloc fa temps que va tancar pero la mítica Internet Wayback Machine en fa fer una foto el 12 de Març de 2013, aquí està:

I've seen several people asking in forums where to get the Nitsuko Builder software. Some point for a dutch version to:
http://members.fortunecity.com/kisbv/software.htm

This site is shutdown, but the Internet Wayback Machine snapshotted it on Mar 12 2013. Here you are:


dijous, 29 de desembre del 2016

Rock Solid B&W Speakers. Tweeter Replacement. Recanvi del Tweeter.

Entreteniments d'estiu.

Fa un temps vaig comprar un kit d'altaveus Rock Solid, fabricats per Bowers & Wilkins. Dos monitors i un Subwoofer passiu.

Una aproximació de la alta fidelitat per a ús en botigues, locals comercials, bars, preparats per un entorn més dur que no pas el domèstic. Bueno, res a veure, tot i que no sonen malament, i sonen molt millor que aquests altaveus de sonorització, que se solen muntar.

 Aquest kit era usat i els tweeters estaven fosos.
Summer entertainment job.

Some time ago I purchased a used speaker kit made by Rock Solid, they were manufactured by Bowers & Wilkins. Two monitors and a passive subwoofer.

They were an approximation of hifi for shops, bars, business environment with heavy duty conditions.
Well, sound is not that good, absolutely. But they are not bad at all, far better that these Public

Address plastic boxes. They were used with blown tweeters.

No en tinc ni idea de cap paràmetre dels tweeters originals.

Tampoc tinc cap pista de la SPL del woofer.
El filtre és de 2n ordre, però les bobines no tenen valor.

Pràcticament no queda més solució que, o bé posar-se a fer un anàlisi amb el generador de funcions, o bé provar. Aquesta vegada farem proves. En una altra ocasió amb unes ProAC SuperTower sí que va valdre la pena per l'anàlisi.
El primer intent va ser amb uns tweeters de Peugeot "Made by Harman" 96 333 557 80 Aquests tweeters de ben segur que son Audax, i es troben en molts altaveus de JBL (Harman Kardon), per exemple les J520M. Pertanyen a la família dels tweeters de mylar d'Audax, amb els AMTIW74 (titani), TW51A (del l'any 1983), TW010, TW014 i s'han fabricat en impedàncies de 4 ohms i 8 ohms, i en diverses SPL i diverses linealitats, alguns fabricats especialment per a marques. Hi ha dotzenes de clons d'aquests tweeters, fabricats per diverses marques, algunes, xineses.
I don't have any clue about original tweeters, impedance, spl.

I also don't have info about the woofer's SPL.

Filter is a 2nd Order (hopefully). But coils do not have any value.

Either we start a deep analysis with a function generator and a Frequency analyzer, or we just make some testing with spare tweeters. Making this is not worth the time. I previously did with a pair of ProAC Supertower and this time it was worth the time.

First attempt was with a couple of "Harman tweeters" from a Peugeot, model number 96 333 557 80, "Made in France". These tweeters must be Audax for sure. These can be found in lots of JBL hifi loudspeakers (for example J520M). They are part of the audax TW51A family of mylar dome tweeters, like AMTIW74 (titanium), TW51A (from 1983), TW010P1 and TW010E1, TW014... They were manufactured in 4 and 8 ohm, several SPL and several linearities, some custom made. There are lots of clones made by several manufacurers, lots of them, chinese.

See the Peugeot Harmann 96 333 557 80  tweeter on the left and he Audax TW010P1 on the right

Datasheets: http://www.audax.com/archives.php 

AMTW51A: https://drive.google.com/file/d/0B8jg2zfyBBjuanNjaGotWVlGTG8/view?usp=sharing TW010I1: https://drive.google.com/file/d/0B8jg2zfyBBjubWtmeGp1OHBIeEE/view?usp=sharing TW014R1: https://drive.google.com/file/d/0B8jg2zfyBBjubEhHdGQzbV9YQjQ/view?usp=sharing TM010A1: https://drive.google.com/file/d/0B8jg2zfyBBjuQTAwVy1TUmlCOWc/view?usp=sharing TW010E1: https://drive.google.com/file/d/0B8jg2zfyBBjuX2ZsSlNveWF3R1E/view?usp=sharing TW010F1: https://drive.google.com/file/d/0B8jg2zfyBBjuNTJrczJTQTFvV1U/view?usp=sharing
TW010P1: https://drive.google.com/file/d/0B8jg2zfyBBjub2hvZ2Y4N3JxblU/view?usp=sharing


Els que jo tenia TW010P1 son de 4 ohms i els de Peugeot crec que deuen ser el mateix perquè no noto diferència.

Una vegda muntats, el só era bó, per els Rock Solid Monitors, però lleugerament apagat si els utilitzàvem amb el subwoofer. Ja tenim una aproximació: 88dB son bons per els monitors però justos per el sistema amb subwoofer.
El Crossover respon bastant bé amb 4ohms, de manera que assumirem que el tweeter original era de 4 ohms.

Aquests tweeters son poc estimats per els usuaris de Peugeot perquè en els Peugeot estan mal filtrats, un simple condensador de 4,7uF fa de filtre de 1r ordre a 8KHz. El tweeter te una resposta bona fins a 14KHz i després cau 6dB fins a 20KHz. Aquesta resposta forma una panxa en 10KHz. Cal currar-se millor el filtre per a treballar amb els TW010P1.
En la meva opinió, no son mals tweeters, tenen una riquesa sonora molt maca, però la alinealitat a dalt de tot necessita que l'enginyer es curri més el filtre.

I had a couple of TW010P1 4 ohm tweeters and I guess Peugeot ones were the same because they measured and sounded the same.

Once assembled the sound was good for the Rock Solid Monitors alone, but slightly low when used with the Rock Solid Subwoofer. So we have an approximation: 88dB SPL are good for the monitors but low for the whole system.
Crossover is working reasonably well with 4 ohm so we could assume that the original tweeter was 4 ohm.

Peugeot owners don't like these tweeters. I guess it is due to a very wrong filtering (only a 4.7uF capacitor, that's a 1st order 8KHz crossover). Tweeter works well till 14K, and then falls 6dB until 20KHz. This is not making a good sound.
In my honest opinion, these are not bad tweeters. They are rich sounding, but that -6dB at the top require a lot of engineering in the xover.


El següent intent ha estat amb uns tweeters de car audio de 90dB 4ohm. He trobat uns Coral Electronics CT35.
El manual dels Coral CT36 posa que tenen 90dB. No tinc la gràfica de SPL. Provarem.

Amb els tweeters a les mans, diria que son un clon dels Audax TM010A1 però Coral és una bona marca.

Encaixen a la perfecció al forat de la caixa.

He tret el filtre incorporat que portaven: el famós condensador de 4.7uF.
Next attempt I tried a couple of car audio tweeters, 90dB and 4ohm. I found a pair of Coral Electronics CT35.
I can read in the Manual for Coral CT36 that they are 90dB, but no SPL graphic.

With the tweeters disassembled I'd say that these are Audax TM010A1 clones, but Coral is a reputated brand.

They fit *perfectly* in the box hole.

I've removed the integrated filter: the 4.7uF cap.


Una vegada instal.lats son exactament el contrari que els Audax

Tenen una zona alta molt brillant, els 2dB adicionals es noten, però per sota queden lleugers. Els plats han guanyat brillantor, però les cordes (piano, mandolina, guitarra clàssica) han quedat sense detall, i les veus son lleugerament nasals.

Potser sí que el tweeter original era de 8 ohms. Posar un tweeter de 4 ohms en un filtre dissenyat per a 8 causa que la freqüència de tall per el tweeter es dobli.
O potser la SPL d'aquest tweeter és així.

Humm... caldrà pensar més.
Once installed, they sound just opposite from the Audax:

Extreme highs are good and these 2 extra dB make the job. But they are thin below. The cymbals are well present but all string instruments lost detail (piano, classic guitar...). Voices got nasal. Too lean mid-high zone.

Maybe the original tweeter was 8 ohm. Using a 4 ohm tweeter in a 8 ohm designed crossover causes the cut frequency to double for the tweeter.
Or maybe this tweeter's SPL is like this.

Humm... let's think more.


1 dia després.

Humm, això caldrà fer-ho bé. Doncs fem-ho!

Desmuntem el Crossover i mesurem les peces, llavors farem simulacions. He fet servir un tester LCR

  • El woofer és de 4 ohms (2.4ohm DC)
  • Una bobina és de 0.33mH
  • L'altra bobina és de 0.17mH
1 day later.

Humm this ought to be done seriously. OK, let's do it.

Let's disassemble the crossover and measure the coils. I used a LCR multimeter.


  • Woofer is 4 ohms (2.4ohm DC)
  • One inductor is 0.33mH
  • The other one is 0.17mH

Rock Solid Monitor Crossover


Anem a fer la simulació amb un tweeter de 4 ohms (Orcad PsPice)Let's make some simulation with a 4 ohm tweeter (Orcad PsPice)


Anem a fer la simulació amb un tweeter de 8 ohms (Orcad PsPice)Let's make some simulation with a 8 ohm tweeter (Orcad PsPice)


CONCLUSIONS:

Pel que veiem, la freqüència de tall efectiva canvia poc (3500Hz), i en el cas del tweeter de 4 ohms, queda excessivament apagat, mentre que en el cas de 8 ohms puja prou bé.

Això coincideix amb el que hem observat (escoltat) a les proves reals.

Així doncs, nou projecte: aconseguir un tweeter de 8 ohms que doni 88-90dB.
Hi ha una resistència de 1.5ohm que ens permetrà acabar d'ajustar la sensibilitat.

Continuarà....
CONCLUSSIONS:

We can see that crossover frequency barely changes (3500Hz) but when using a 4ohm tweeter, it gets few power and a bad mirange-high. A 8 ohm tweeter works much better.

This is what we could see (listen) in real testing.

So new project: get a 8 ohm tweeter in the range of 88-90dB.
There is a 1.5ohm resistor that will let us match the sensibility.

To be continued...


6 mesos després...

Resulta car anar comprant tweeters. Enlloc de gastar diners anem a gastar unes quantes neurones per a adaptar el tweeter Coral CT35. Això vol dir feina seriosa amb el Crossover.

OK partim que perseguim això: aquesta és la simulació del filtre original.
   
... 6 months later...

Purchasing tweeters is expensive. Instead of spending money, let''s spend some time trying to get the most of the Corals CT35. This means serious work with the Xover.

We are trying to get this: (this is the response of the original filter)

Original crossover response.


Construeixo un full de càlcul amb les fórmules per a saber la Q del filtre. M'ajudo de  de la web de Rod Elliott:
http://sound.whsites.net/lr-passive.htm

I build a spreadsheet to guess the Q of the filter. I use the formulas in the Rod Elliott web:
http://sound.whsites.net/lr-passive.htm


El full de càlcul calcula tots els Condensadors i totes les Bobines per una determinada freqüència de tall, i coloreja la cel.la dels components que coincideixen (10% tol) amb amb les trobades al disseny. En el punt que coincideixen tant el valor de la bobina com el condensador, trobem la Q

Q= 0.65 per el filtre del Woofer (Bessel)
Fc=2500Hz
Q=1,15 per el filtre del Tweeter (Butterworth)
Fc=6500KHz
Spreadsheet calculates all the Coil and Capacitor values for the different Q, given a Cut frequency. When the values are equal (10%tol) to the componenents in the filter, the cell is coloured. When both cells, cap value and coil value are the same as the original component, we can guess the Q of the filter.

Q=0,65 for the Woofer filter (Bessel)
Fc=2500Hz
Q=1,15 for the Tweeter (Butterworth)
Fc=6500Hz


Vull mantenir la Q del filtre perquè probablement el woofer tingui unes mancances que requereixi que el tweeter actuï d'aquesta manera tant rara.

Mantinguent Fc=6500 i Q=1,15, cercarem els nous valor de L i de C per el tweeter de 4 ohms.

Utilitzant el full de càlcul puc trobar L=0,08mH i C=7uF
En components reals, podriem escollir:
L= 0,1mH (Visaton la fabrica)
C=6,8uF 
I want to keep the Q of the filter because the woofer probably has a response that needs the tweeter to work that strange way.

I keep Fc=6500 and Q=1,15. Now I need to calculate the new L and C values for the 4 ohm tweeter.

Using the spreadseet I can find L=0,08mH and C=7uF
Standard component values:
L=0,1mH (manufactured by Visaton)
C=6.8uF


Anem a comprovar la resposta amb el PsPice Let's see the response using OrCAD PsPice

Modified Crossover Response trying to match original filter but using a 4 ohm tweeter


La resposta és molt similar a la del filtre original. Aquesta vegada probablement l'hem encertat,
El tweeter està 2.5dB atenuat respecte el woofer per la resistència en serie de 1.5ohm Aquesta resistència ens ajudarà a adaptar les sensibilitats. No sabem la sensibilitat de cal dels drivers, haurem de treballar-ho a "orella"
Frequency response is very close to the original filter. I think this time we guessed it.
Tweeter is 2.5dB under the woofer SPL due to the series 1.5ohm resistor. This resistor helps to match both drivers' SPL. We do not have data about the SPL of any of the drivers, so we will need to experiment.


Muntem els components nous al Crossover. Els components es poden trobar amb relativa facilitat a eBay. Let's assemple new compoenents to the Xover. New components can be easily found at eBay.


Original Rock Solid Monitor Xover


Modified Rock Solid Monitor Xover.


Final feliç per els monitors Rock Solid:
FUNCIONEN ESPLÈNDIDAMENT

Ha sigut necessari canviar la resistència en serie de 1.5ohms per una de 1 ohm (veure foto) per a alinear bé la sensibilitat dels dos altaveus.

La reproducció és francament bona: detallada, amb tot l'aire que abans faltava, amb una zona de mitjos potent i "musical", uns aguts clars, i uns greus (donats per el subwoofer) de gran calidesa.

Una peça que va molt bé per a ajustar Crossovers és "Willie Dixon - Save my child"  https://youtu.be/u_NokJ-fSpw
Tenim bons greus, una zona mitja amb uns detalls de respiració que cal assegurar de reproduïr i una secció metàl.lica que treballa les zones del crossover.

Llista de components:

2 x Coral CT35 mylar tweeter (probablement molt semblant als Audax TM010A1 però amb millor SPL)
2 x Condensador 6.8uF NP
2 x Bobina d'aire Visaton 0.1mH
2 x Resistencia 1 ohm 5 watts
Great ending for the Rock Solid Monitors
THEY WORK VERY WELL!

I had to replace the 1.5ohm series resistor by a 1ohm one (see photo) to match both drivers SPL.

Sound quality is pretty good! detailed, powerful, yet has enough air that was lacking before. Midrange is fine and overall warm with crisp treble.

A good test piece is "Willie Dixon - Save my child" https://youtu.be/u_NokJ-fSpw
We have deep bass, great mirdange with breathe details that need to be there, and some metal instruments that will help to test the xover zone. Very nice!


Bill of materials:

2 x Coral CT35 mylar tweeter (probably very close to Audax TM010A1 but having better SPL)
2 x Capacitor 6.8uF NP
2 x Air Coil Visaton 0.1mH
2 x Resistor 1 ohm 5 watts